Snowflake decorations
Share
I nearly spent a fortune the other day on snowflake decorations. Yes, they were beautiful but surely, I thought, there has to be a cheaper way?
I tried to remember how we used to make paper snowflakes at school when I was a child and armed with paper and scissors I got to work, but the results were dreadful. Something wasn't right. Then I had an eureka moment! Martha Stewart of course, she would know.
More scissors, more paper, and my snowdrops are just like, well, snowdrops actually! All I have to do now is arm The Fairy with glue and glitter, attach invisible wire (fishing wire) and hang them. Can't wait!
Here's to Martha!


Start with a square piece of paper. Fold the paper in half diagonally to make a triangle.

Now, fold the triangle in half so the pointy corners meet.

Fold your triangle into thirds.

Fold into the shape as shown. You may need to adjust these folds a little to get the sides to match up, so don't crease the paper until the folds are just right.

Cut across the bottom of your paper so it is straight.

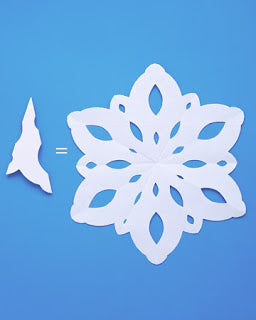
Cut the folded paper with variations of straight and curvy lines. Get creative with your snowflake designs by experimenting with different sizes and shapes of cutouts.

Gently unfold the paper to see your unique snowflake. Use poster putty to attach to windowpanes, or make a wreath of snowflakes by sticking them one at a time to a wall with poster putty.


